Learn how to easily install Checkmk on Rocky Linux 8 or Oracle Linux 8 for efficient monitoring of your systems.
Monitoring the performance and availability of your servers and applications is essential for ensuring their smooth operation. Checkmk, a comprehensive monitoring solution, offers a wide range of features to monitor various aspects of your infrastructure. In this article, we will guide you through the process of installing Checkmk on Rocky Linux 8 or Oracle Linux 8. By following these steps, you will be able to set up a powerful monitoring system to keep a close eye on your systems and applications. With Checkmk, system administrators can monitor various aspects of their infrastructure, including servers, network devices, applications, and services. System administrators can set up thresholds and notifications to receive alerts when certain metrics exceed defined limits, enabling proactive troubleshooting and problem resolution.

1. Install prerequisite packages
To install the EPEL repository, execute the command:
# sudo dnf install epel-release -y
Install xinetd and OpenSSL packages :
# sudo dnf install xinetd openssl -y
Make sure python3 is install, if not install, then run the following command :
# sudo dnf install python3 -y
Run following command to verify the python version :
# python3 -V
Python 3.6.8
Install ‘graphiz-gd’ package from PowerTools repository, run the following dnf command :
# sudo dnf --enablerepo=powertools install graphviz-gd -y
2. Configure Firewall Rules
Allow http service or its port in firewall, run the following :
# firewall-cmd --zone=public --add-service=http --permanent
# firewall-cmd --reload
3. Downloading Checkmk for Rocky Linux 8
But you need to install wget command, because it is not preinstalled on minimal Rocky Linux 8 operating systems.
# sudo dnf install wget -y
Now execute wget command to download Checkmk software.
# wget https://download.checkmk.com/checkmk/2.2.0p5/check-mk-raw-2.2.0p5-el8-38.x86_64.rpm
Then import the key to the list of trusted signatures.
# rpm --import https://download.checkmk.com/checkmk/Check_MK-pubkey.gpg
4. Installing Checkmk monitoring tool
Now install the package including all of its dependencies.
# sudo dnf install check-mk-raw-2.2.0p5-el8-38.x86_64.rpm
Verify installation of Checkmk software was successful by running the omd version command:
# omd version
![]()
Use the omd command to create a new Checkmk site. You can choose your own name, in this example we named the site ‘monitoring’
# sudo omd create monitoring
Full Output :
[root@rockyserver ~]# sudo omd create monitoring
Adding /opt/omd/sites/monitoring/tmp to /etc/fstab.
Creating temporary filesystem /omd/sites/monitoring/tmp...OK
Updating core configuration...
Generating configuration for core (type nagios)...
Precompiling host checks...OK
Executing post-create script "01_create-sample-config.py"...OK
Restarting Apache...OK
Created new site monitoring with version 2.2.0p5.cre.

  The site can be started with omd start monitoring.
  The default web UI is available at http://rockyserver.linodelinux.com/monitoring/

  The admin user for the web applications is cmkadmin with password: sNzu7G4U
  For command line administration of the site, log in with 'omd su monitoring'.
  After logging in, you can change the password for cmkadmin with 'cmk-passwd cmkadmin'.
# sudo omd start monitoring
When everything has been started successfully you will see an output similar to the one below.
[root@rockyserver ~]# sudo omd start monitoring
Temporary filesystem already mounted
Starting agent-receiver...OK
Starting mkeventd...OK
Starting rrdcached...OK
Starting npcd...OK
Starting nagios...OK
Starting apache...OK
Starting redis...OK
Initializing Crontab...OK
5. Getting started with Checkmk
[root@rockyserver ~]# omd su monitoring
OMD[monitoring]:~$ cmk-passwd cmkadmin
New password:
Re-type new password:
OMD[monitoring]:~$ exit
logout
Login using http://rockyserver.linodelinux.com/monitoring/
Change to your own FQDN or ip address.

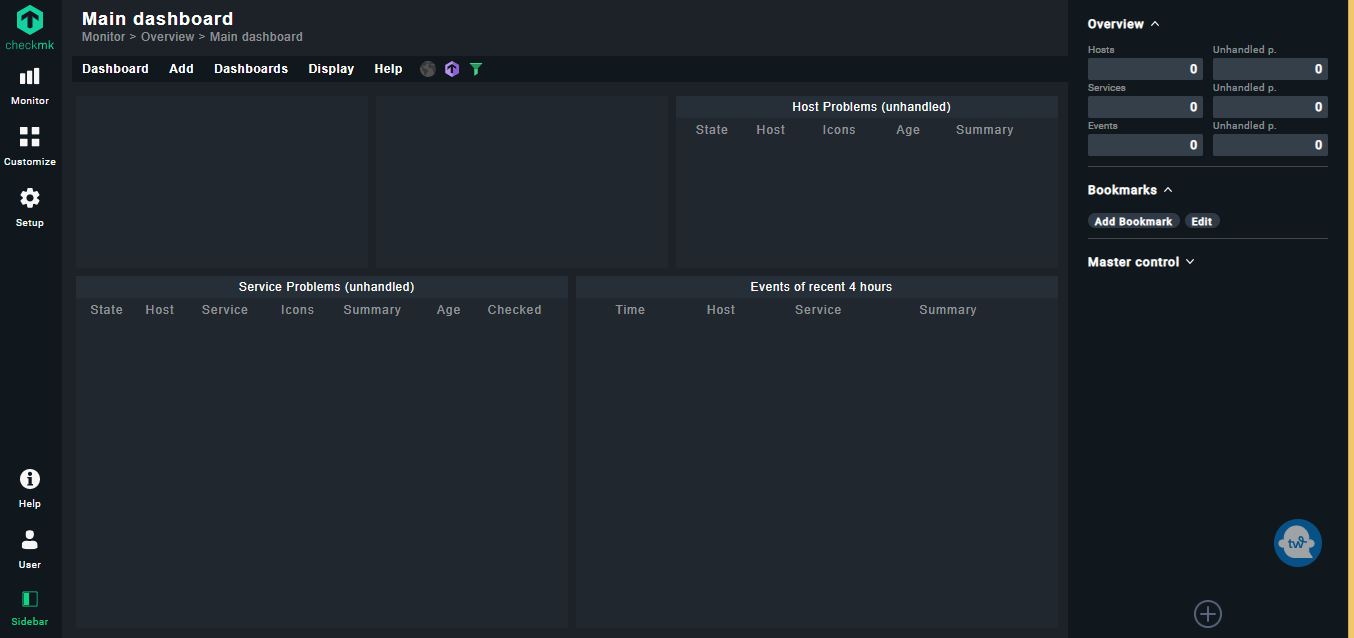
Navigate main dashboard to start the configuration :
6. Add a remote Linux host to Checkmk to monitoring
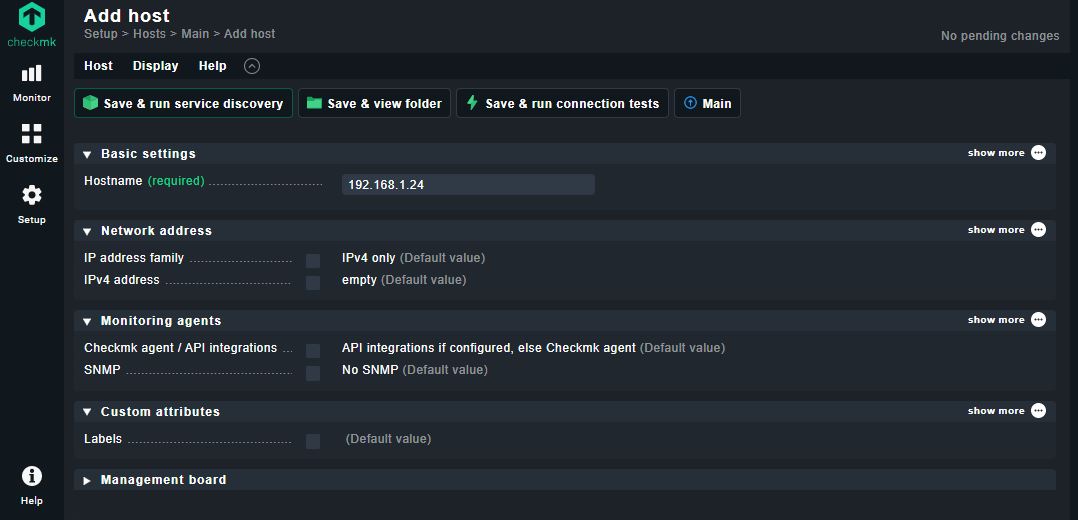
One of the example client server that you want to monitor is 192.168.1.24 which requires you to install the Checkmk agent. The checkmk server is rockyserver.linodelinux.com
Login to 192.168.1.24 then issue the following wget command to download the linux client :
# wget http://rockyserver.linodelinux.com/monitoring/check_mk/agents/check-mk-agent-2.2.0p5-1.noarch.rpm
Once you have downloaded the agent, install it using the rpm command as shown:
# rpm -ivh check-mk-agent-2.2.0p5-1.noarch.rpm
Then install xinetd daemon.
# sudo dnf install xinetd -y
Verify Checkmk agent listens on port 6556 :
# netstat -plunt | grep cmk-agent
tcp6       0      0 :::6556                 :::*                    LISTEN      4189586/cmk-agent-c
To open the port and effect the changes on the firewall, run the command:
# sudo firewall-cmd --permanent --add-port=6556/tcp
# sudo firewall-cmd --reload
After agent installed at client server, login Login again to http://rockyserver.linodelinux.com/monitoring/
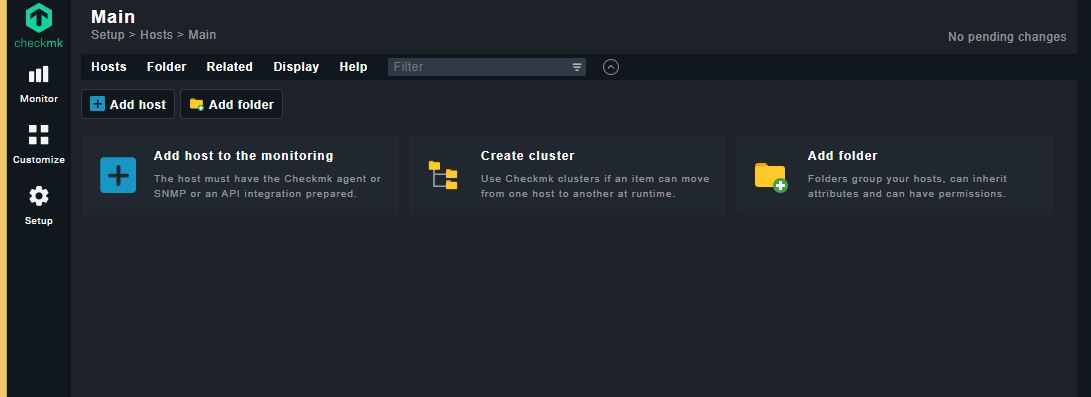
Click “Add host to monitoring”
Enter hostname or “ip address” and click “Save & run service discovery”:
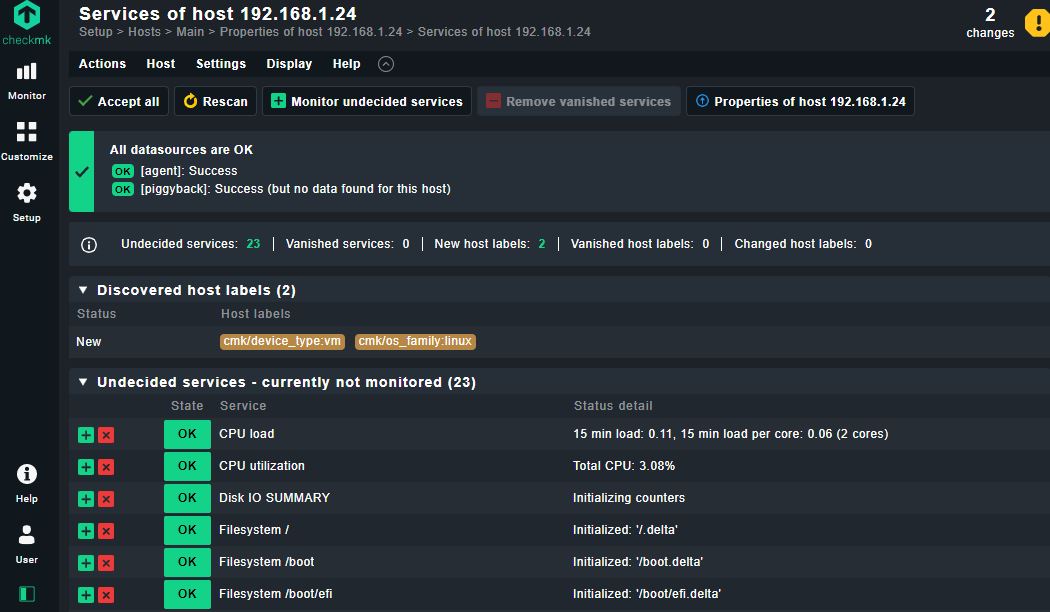
Next screen will list of the host’s services will be populated as shown :
Visit official checkmk website for more example client configuration.
Conclusion:
Setting up a monitoring system is crucial for maintaining the stability and performance of your infrastructure. With Checkmk, you can easily monitor various aspects of your systems and applications, enabling you to identify issues proactively and take appropriate action. In this article, we provided a step-by-step guide on installing Checkmk on Rocky Linux 8 or Oracle Linux 8.
By following the outlined instructions, you should now have a functional installation of Checkmk, ready to monitor your servers and applications. Remember to explore the vast array of features and configuration options that Checkmk offers to tailor the monitoring system to your specific needs.
With continuous monitoring in place, you can ensure the optimal performance of your infrastructure, prevent downtime, and enhance the overall efficiency of your organization. Happy monitoring!