Oracle Linux 8 is a popular operating system that is widely used for most web or application server hosting. If you are a linux system administrator or a software developer who manages Oracle Linux 8 servers, then you might need to install various applications and tools to manage your server effectively. Webmin is one such tool that provides a web-based interface for managing various system administration tasks such as user account management, package installation, and configuration of various system settings. In this article, we will guide you through the process of installing Webmin on Oracle Linux 8, step-by-step. Whether you are new to system administration or an experienced professional, this article will provide you with all the necessary information you need to install Webmin on your Oracle Linux 8 server.

Steps to Install Webmin on Oracle Linux 8
1. Update the System: Before installing any new software, it is recommended to update the system to ensure that all the latest security patches and updates are installed. Open a terminal window and run the following command:
# sudo dnf update -y
2. Add Webmin Repository: Next, we need to add the Webmin repository to our system. Open a terminal window and run the following command to add the Webmin repository to your system:
# sudo vi /etc/yum.repos.d/webmin.repo
Add the following lines to the file and save it:
[Webmin]
name=Webmin
mirrorlist=https://download.webmin.com/download/yum/mirrorlist
enabled=1
gpgkey=http://www.webmin.com/jcameron-key.asc
enabled=1
3. Import GPG Key: To ensure that the packages we download from the Webmin repository are authentic and not tampered with, we need to import the GPG key of the Webmin repository. Run the following command in the terminal:
# sudo rpm --import http://www.webmin.com/jcameron-key.asc
# dnf repolist
repo id                 repo name
Webmin                  Webmin
ol8_UEKR6               Latest Unbreakable Enterprise Kernel Release 6 for Oracle Linux 8 (x86_64)
ol8_appstream           Oracle Linux 8 Application Stream (x86_64)
ol8_baseos_latest       Oracle Linux 8 BaseOS Latest (x86_64)
pgdg-common             PostgreSQL common RPMs for RHEL / Rocky 8 - x86_64
pgdg11                  PostgreSQL 11 for RHEL / Rocky 8 - x86_64
pgdg12                  PostgreSQL 12 for RHEL / Rocky 8 - x86_64
pgdg13                  PostgreSQL 13 for RHEL / Rocky 8 - x86_64
pgdg14                  PostgreSQL 14 for RHEL / Rocky 8 - x86_64
pgdg15                  PostgreSQL 15 for RHEL / Rocky 8 - x86_64
4. Install Webmin: Now, we can install Webmin on our system using the following command:
# dnf install webmin -y
5. Configure Firewall: If you have a firewall enabled on your system, you need to open the port used by Webmin to allow incoming traffic. Run the following command in the terminal:
# firewall-cmd --add-port=10000/tcp --permanent
# firewall-cmd --reload
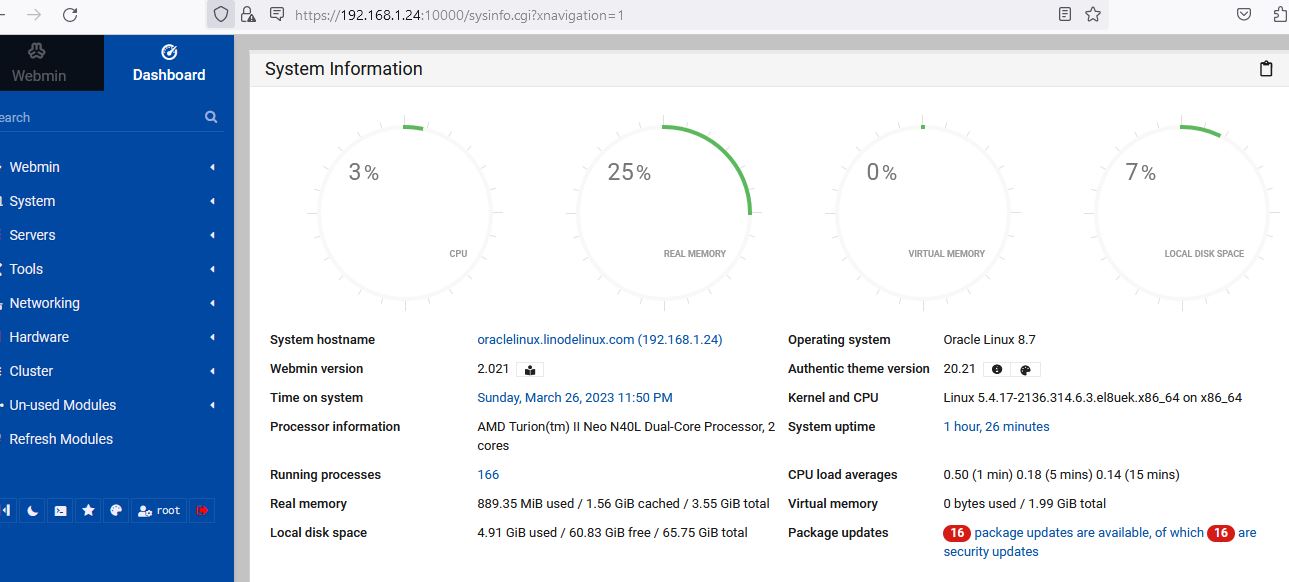
6. Access Webmin: Now, open a web browser on your local machine and enter the following URL:
https://192.168.1.24:10000
